Wrath of the Beast - "Live Dangerously" Achievement/Trophy

Step on the button with the earth symbol in the MAIN ROOM of the HALL OF SEASONS to open the three nearby doors.
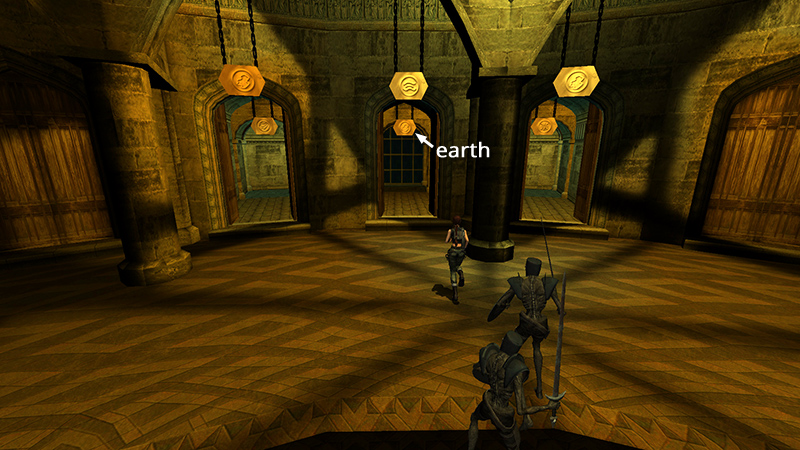
Run to the middle door (i.e., the one with the earth symbol above lever, not the outer door).
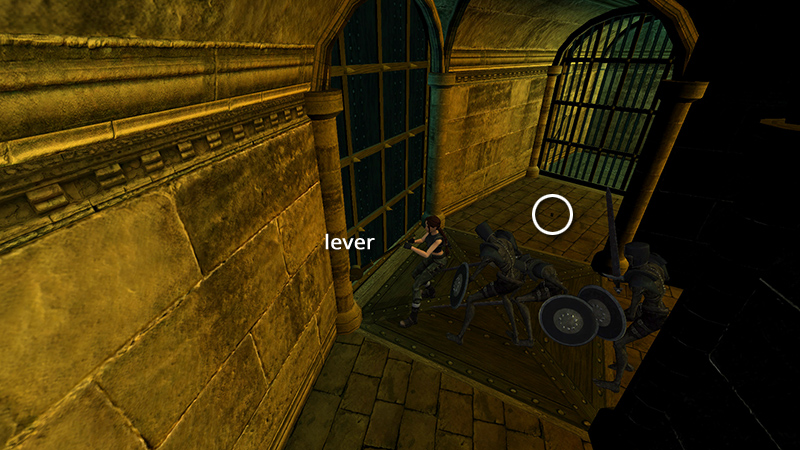
Pull the lever to open the portcullis.
NOTE: There's a Viper clip (counted in HALL OF SEASONS) lying on the floor in the connecting hallway between the right and middle doors. I would wait and pick it up on the return trip, since you'll probably have undead knights hot on your tail at this point.
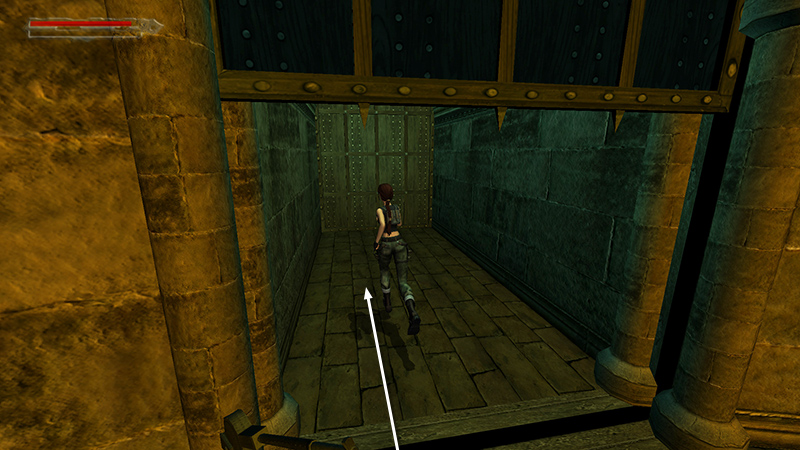
As with the other element levels, you may want to save in a new slot before entering, since you can't leave until you've completed it. Run through then step forward to trigger a cutscene.
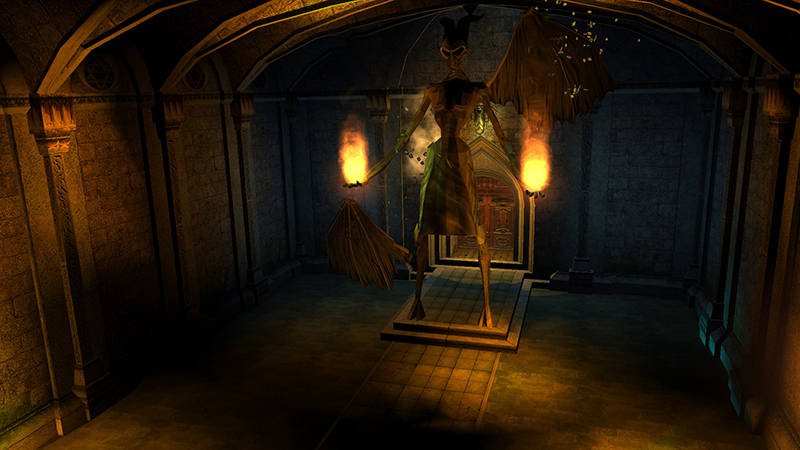
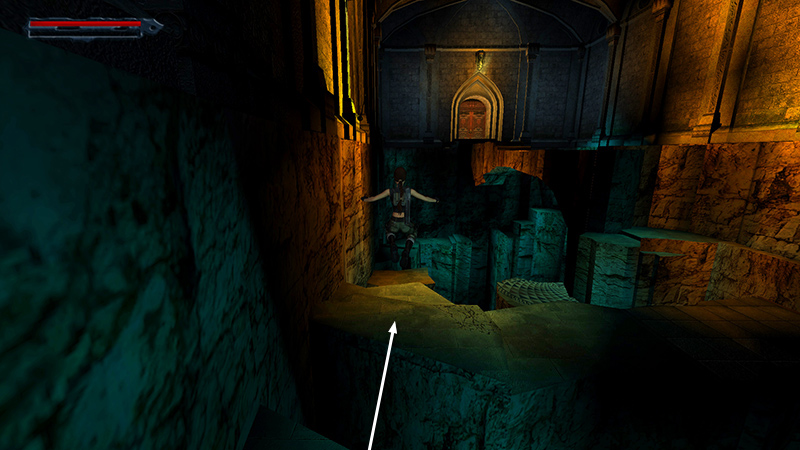
The rather impressive Nephilim statue on the far side of the cavernous room crumbles, destroying most of the floor.
Walk forward but not too far. The floor ahead falls away, but the ledge near the entrance remains solid.
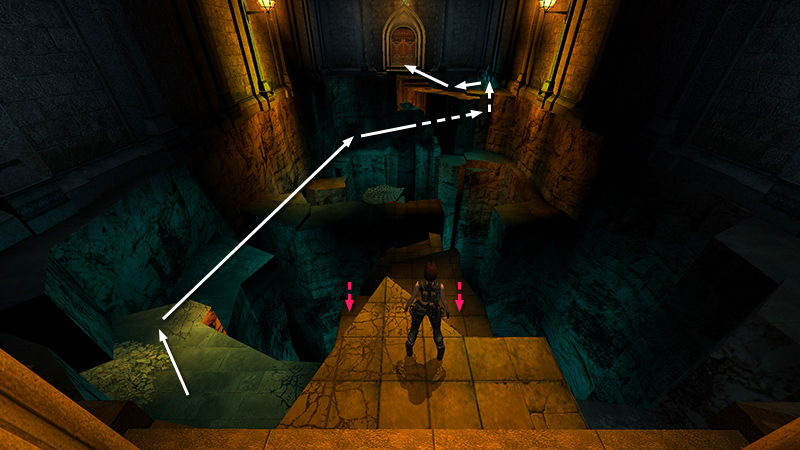
The path we'll take for the "Live Dangerously"achievement/trophy is outlined above: along the left wall to the far left corner, then along the far wall to the far right corner, upward to the elevated walkway, and on to the alcove. Specifics follow. (If you aren't interested in achievements/trophies, you can follow this alternate path.)

First, drop down onto the ledge below on the right to get some bandages (1).
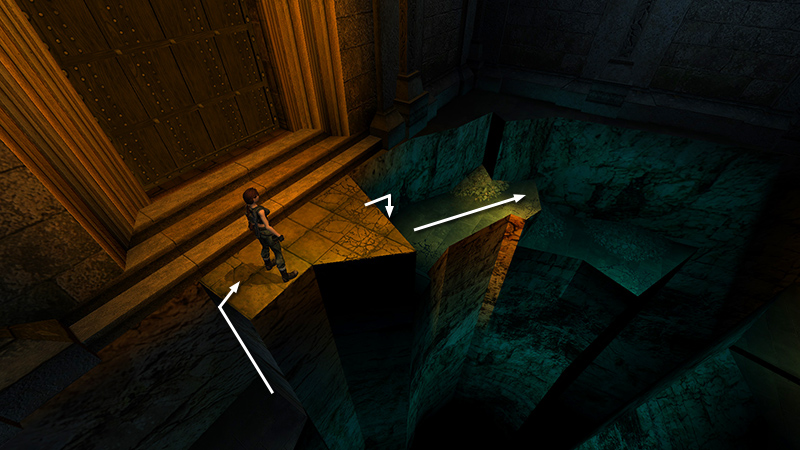
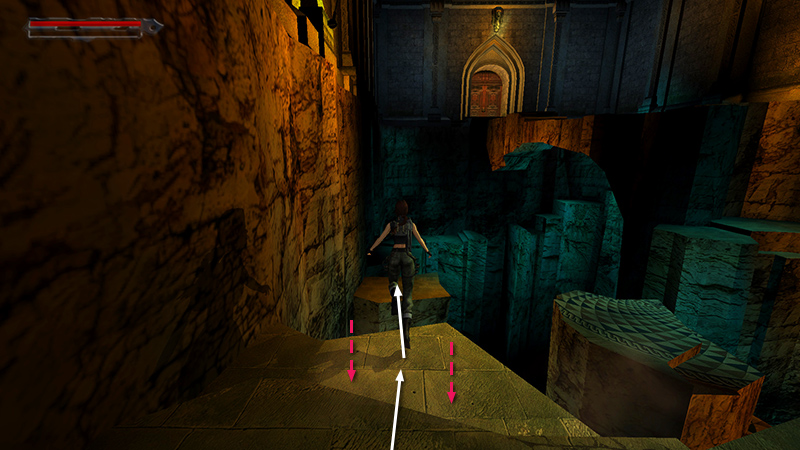
Climb back up to the doorway. Now drop down on the left side and continue forward to the corner.
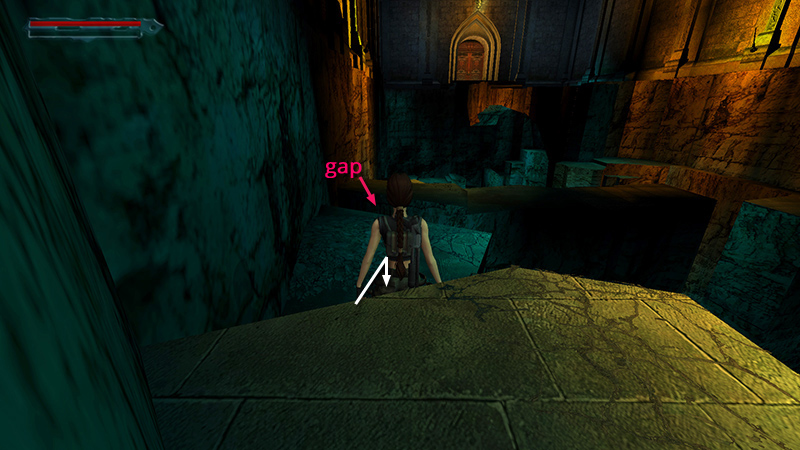
Turn so the long wall is on Lara's left and step down onto the next lower block. Now comes the exciting part. Most of the blocks in the following sequence collapse as Lara passes. So you'll need to move quickly and decisively. Quick-save first if you like. If you start here, with Lara's back to the ledge behind her...
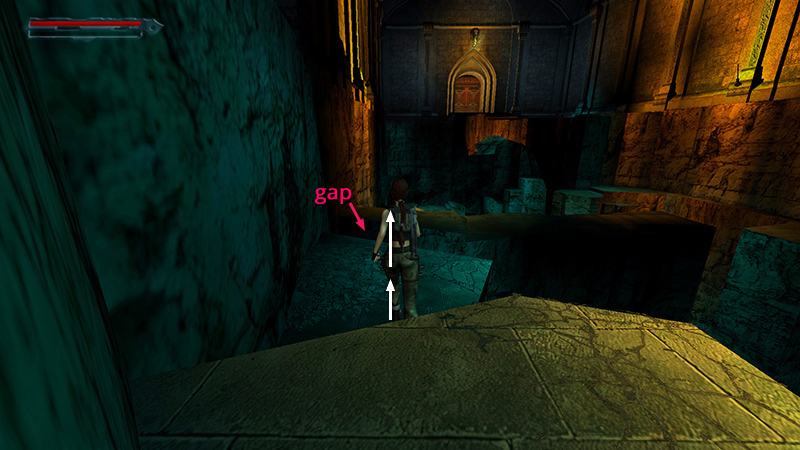
...run forward and jump a few steps before the edge, Lara should clear the gap...
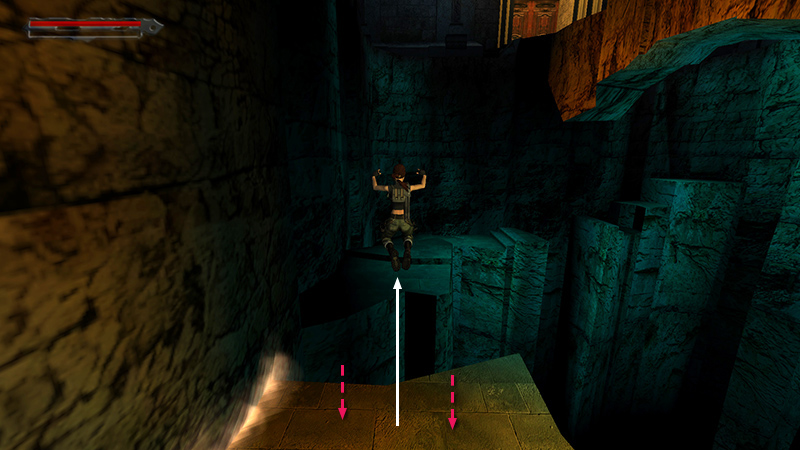
...and land on the rocky bridge connecting the two sides of the room. Without hesitating...
...take a running jump off the pointed, light-colored block directly ahead before it collapses. As soon as Lara lands on the next block (i.e., the one with the reddish-brown top)...
...take a standing jump onto the bluish ledge ahead, as the reddish block falls away.
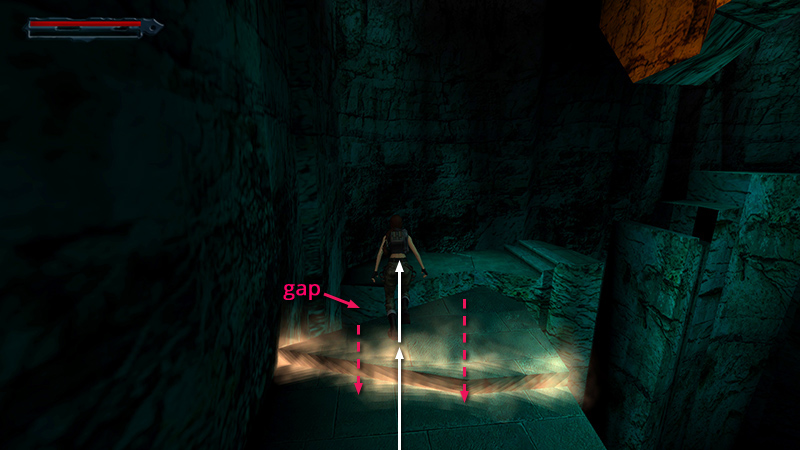
Run and jump over the next gap to land on the far left corner ledge.
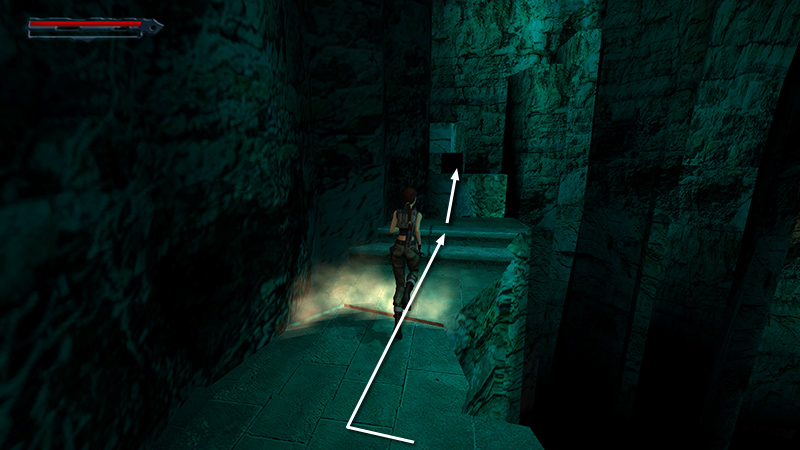
Turn right, run up the collapsing steps, and jump at the top to land on the next block.
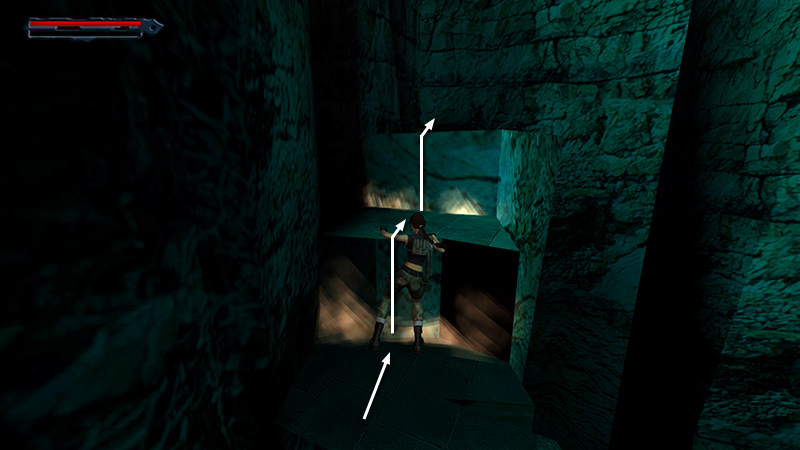
Run forward, vault up onto the next block, then next.
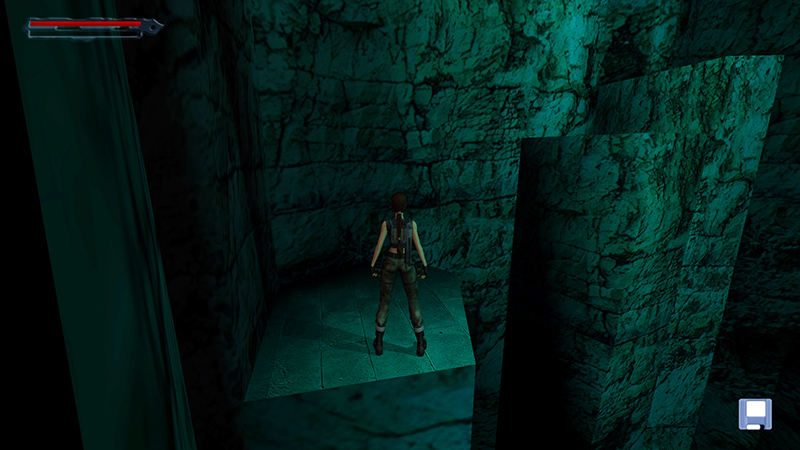
When you reach this corner ledge, you can breathe and quick-save again if you like. The rest of this sequence is the same regardless of which path you take, so continue with the next section.
DARK MODE: I plan to add optional dark mode for these pages, but my current priority is updating the walkthroughs. Meanwhile, may I suggest a reputable dark mode browser extension, such as Dark Reader? (Download only from trusted sites, like darkreader.org or your browser's official add-on/extension site.)
Walkthrough text and diagrams copyright © Stellalune (email ). Feel free to copy or print this walkthrough for personal use. By all means, share it with friends, but please include this credit line so people can send me their feedback. No part of this walkthrough may be reproduced on another site without permission.